
Due to the extremely high temperatures being achieved, please ensure to place the oven in a well-ventilated area, as it will emit smoke when cooking.Do not use the appliance near the edge of a countertop or table. Ensure the surface is stable, level, heat-resistant and clean.
the Smart Oven™ Pizzaiolo
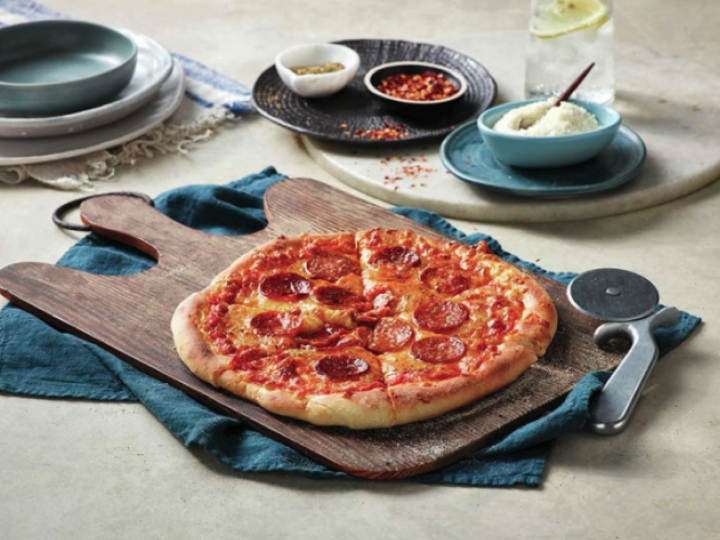
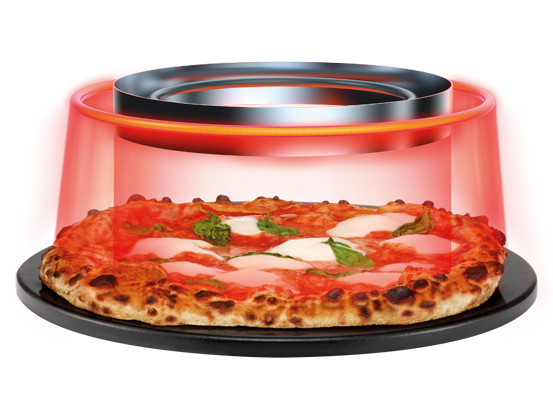
Cook an authentic wood fired style pizza in 2 minutes.

Colour: Brushed Stainless Steel
$999.00
Pizza in 2 minutes from your countertop.
Colour:Brushed Stainless Steel
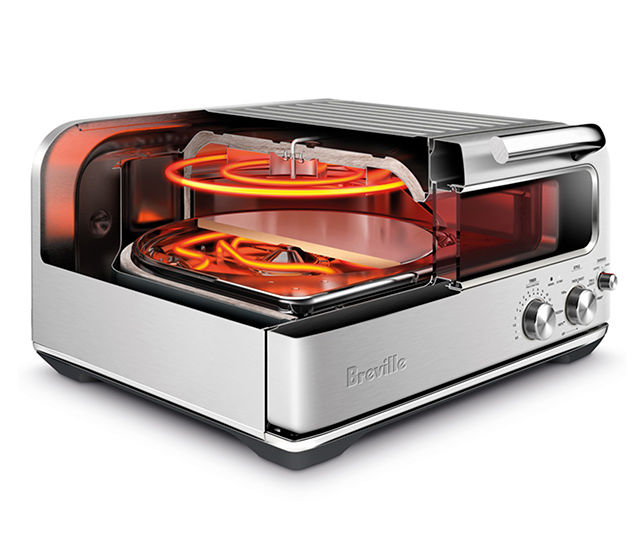
Conductive Heat
Dynamic heat deck
The dynamic heat deck has been designed to sit directly above responsive Incoloy heating elements. The natural Cordierite stone is heated quickly and evenly to maintain the correct temperature, cooking the pizza base to the desired finish, with just the right amount of char.

Radiant Heat
Intense direct heat to create leopard spotted crusts
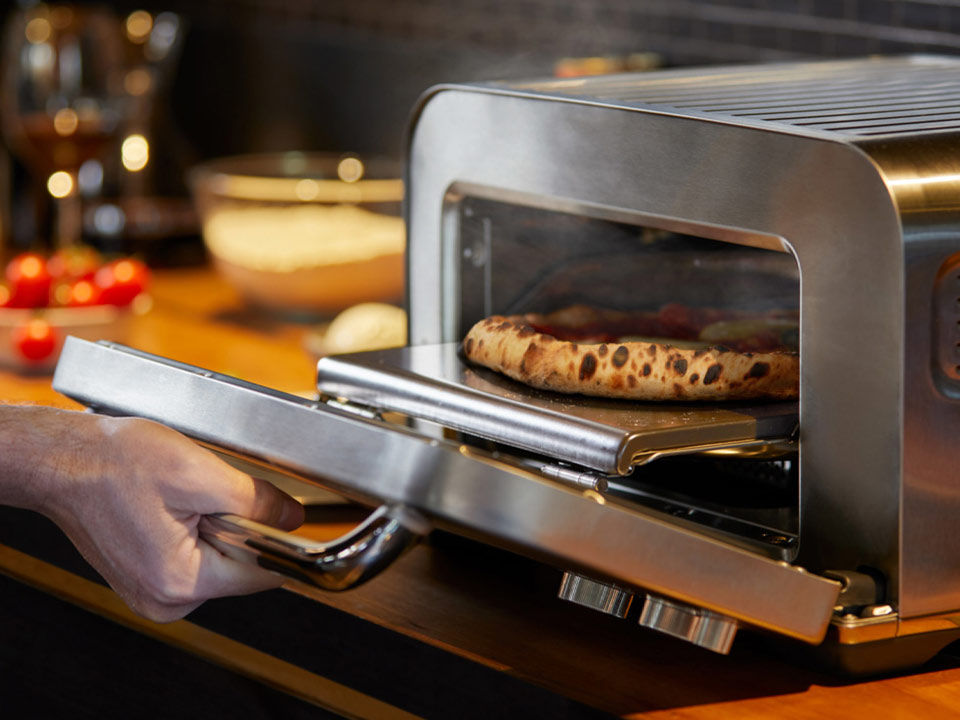
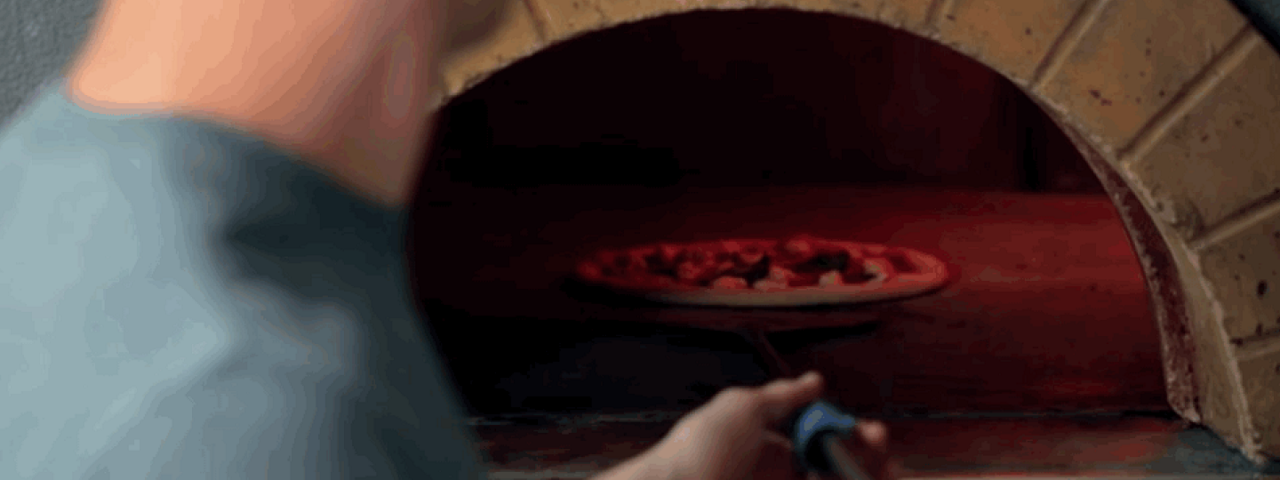
Oven cooks evenly without needing to rotate food and compensates for heat loss through window. Ceiling of oven cavity designed to maximise efficiency of the top heater and direct energy onto pizza crust. Integrated deck to door design moves the pizza closer to the elements and makes it easy to load and unload.
Convective Heat
Optimised deflector technology
The optimised deflector shield has been designed to protect your fragile toppings from the powerful heat while reflecting heat towards your crust to achieve a flavourful leopard spotting effect. Perfect for the classic Neapolitan pizza result expected from a wood-fired oven.

The home pizza oven re-imagined by the Element iQ System
The Pizzaiolo is the first domestic countertop oven to reach 400°C and cook an authentic wood fired style pizza in 2 minutes with no rotating required. It replicates the three types of heat generated by a brick oven - conductive, radiant and convective.
Conductive Heat
Radiant Heat
Convective Heat
Brick oven performance in a benchtop oven
This looks better in your kitchen
Download our Augmented Reality App
Technical Specifications

Accessories
- Pizza Peel, Pizza Pan
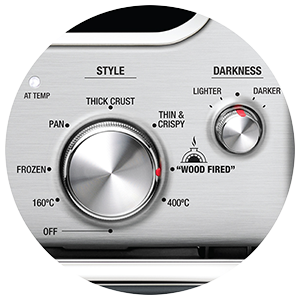
Settings
- 7 Presets & Manual Mode
Dimensions (WxDxH)
- 47.2 x 46.5 x 27.3
Capacity
- 30 cm Pizza
Construction Materials
- Stainless Steel
Voltage
- 240V
Power
- 1735-2065 W
Warranty
- 2 Year Replacement Warranty

Pizzaiolo around the web
 "If your homemade pizza looks more like sugo-stained bunting than a blistered-crust Neapolitan pie, it could be because your oven isn't hot enough. Intense heat is required to create a leopard-spotted edge – the kind of heat found in traditional wood-fired brick ovens and Breville's latest benchtop creation."
 "The results and incredible convenience of Breville’s Pizzaolo will find this baby deck oven that can be used indoors (i.e.an apartment) compelling, to say the least."
 "We’ve been rolling up a storm in the Test Kitchen, making real woodfired-style pizzas in the new Breville Smart Oven™ Pizzaiolo, and the results have been both impressive and delicious."
 "Ask anyone and they’ll happily tell you what they think is the best pizza in the world. These answers, however, may likely see a radical change in the coming months thanks to the Breville Smart Oven Pizzaiolo – the latest essential appliance for any home kitchen, giving you the power to make a slice exactly to your preference."
 "It’s possibly the best way to make homemade pizza that doesn’t involve building a brick oven in the backyard."
the Smart Oven™ Pizzaiolo
from $999.00

Join our community
By signing up you agree to learn more about our Pizzaiolo and other products, and that you have read our Privacy Policy. You can opt out any time.